How to Set up Styled-Components with SSR in NextJS (Typescript)

Jasser Mark Arioste

Hello, hustlers! In this tutorial, you'll learn how to set up styled-components themes in NextJS 12 when using Typescript.
Tutorial Objectives #
After this tutorial, you should be able to learn the following:
- Set up
styled-componentsfor SSR in NextJS v12+ - Modify the
DefaultThemeinterface fromstyled-components - Set up light and dark themes using
styled-componentsin NextJS. - How to implement a
<Button/>component with the theme.
Project Setup #
Let's create a fresh NextJS app from scratch by running the command
npx create-next-app --ts next-styled-components-tutorialNext, let's install styled-components package:
#npm
npm i styled-components --save
npm i @types/styled-components --save-dev
#yarn
yarn add styled-components
yarn add -D @types/styled-components
Next, let's modify next.config.js compiler to use styled-components:
/** @type {import('next').NextConfig} */
const nextConfig = {
  reactStrictMode: true,
  swcMinify: true,
  compiler: {
    styledComponents: true,
  },
};
module.exports = nextConfig;123456789
Next, let's create a pages/_document.tsx file and copy the code below:
// pages/_document.tsx file import Document, { DocumentContext } from "next/document"; import { ServerStyleSheet } from "styled-components"; export default class MyDocument extends Document { static async getInitialProps(ctx: DocumentContext) { const sheet = new ServerStyleSheet(); const originalRenderPage = ctx.renderPage; try { ctx.renderPage = () => originalRenderPage({ enhanceApp: (App) => (props) => sheet.collectStyles(<App {...props} />), //gets the styles from all the components inside <App> }); const initialProps = await Document.getInitialProps(ctx); return { ...initialProps, styles: ( <> {initialProps.styles} {/*👇 insert the collected styles to the html document*/} {sheet.getStyleElement()} </> ), }; } finally { sheet.seal(); } } }1234567891011121314151617181920212223242526272829
More info on this technique in NextJS documentation: Customizing RenderPage.
Once that's done, we're now ready to create themed components.
Step 1 - Modifying the DefaultTheme
#
We're using module augmentation to modify the DefaultTheme interface from styled-components to define our own theme.
When you hover over the DefaultTheme interface, it shows you a simple documentation:
This interface can be augmented by users to add types to styled-components'
default theme without needing to reexport ThemedStyledComponentsModule.1
First, create a file styled.d.ts at your root project directory and copy the code below.
// styled.d.ts import "styled-components"; interface IPalette { main: string; contrastText: string; } // we'll use a very simple theme with palette and colors declare module "styled-components" { export interface DefaultTheme { name: string; borderRadius: string; bodyColor: string; textColor: string; palette: { common: { black: string; white: string; }; primary: IPalette; secondary: IPalette; }; } }1234567891011121314151617181920212223
Explanation:
Here we define some properties that we want to use for our app in the DefaultTheme interface. You can add or remove any property you need for your project here depending on your requirements.
Step 2 - Creating Themes #
Next, let's create two themes (default and dark) to be used in our application. First, create the file components/themes/defaultTheme.tsx:
// components/themes/defaultTheme.tsx
import { DefaultTheme } from "styled-components";
export const defaultTheme: DefaultTheme = {
  name: "default",
  borderRadius: "4px",
  bodyColor: "#ffffff",
  textColor: "#000000",
  palette: {
    common: {
      black: "#121212",
      white: "#ffffff",
    },
    primary: {
      main: "#3b82f6",
      contrastText: "#ffffff",
    },
    secondary: {
      main: "#d946ef",
      contrastText: "#ffffff",
    },
  },
};12345678910111213141516171819202122
Next, let's create the dark theme. Create the file components/themes/darkTheme.tsx:
// components/themes/darkTheme.tsx import { DefaultTheme } from "styled-components"; export const defaultTheme: DefaultTheme = { name: "default", borderRadius: "4px", bodyColor: "#ffffff", textColor: "#000000", palette: { common: { black: "#121212", white: "#ffffff", }, primary: { main: "#3b82f6", contrastText: "#ffffff", }, secondary: { main: "#d946ef", contrastText: "#ffffff", }, }, };12345678910111213141516171819202122
Step 3 - Creating a Global Style #
Let's create the a global style that uses the theme properties. Create a file components/themes/GlobalStyle.tsx:
import { createGlobalStyle } from "styled-components"; export const GlobalStyle = createGlobalStyle` body { background-color: ${({ theme }) => theme.bodyColor}; color: ${({ theme }) => theme.textColor}; } `;12345678
Note that we get the full type-safety if we check the theme object. This is the main reason why we're using Typescript. We can use any value from our theme object and apply it into our styled components.

Step 4 - Implementing Theme Switching #
Let's implement theme switching by using local storage to store the user's preferred theme. we'll use the defaultTheme as default.
But first, let's install a nifty hooks library in react: usehooks-ts. It contains several custom hooks including a useLocalStorage hook.
#yarn
yarn add usehooks-ts

#npm
npm i usehooks-ts12345
Next, let's modify pages/_app.tsx and setup the ThemeProvider:
// pages/_app.tsx import type { AppProps } from "next/app"; import { ThemeProvider } from "styled-components"; import { useLocalStorage } from "usehooks-ts"; import { defaultTheme } from "../components/themes/defaultTheme"; import { GlobalStyle } from "../components/themes/globalStyle"; function MyApp({ Component, pageProps }: AppProps) { const [theme] = useLocalStorage("theme", defaultTheme); return ( <ThemeProvider theme={theme}> <GlobalStyle /> <Component {...pageProps} /> </ThemeProvider> ); } export default MyApp;12345678910111213141516
Next, let's modify pages/index.tsx and create a handle to change the theme on the browser.
// pages/index.tsx import type { NextPage } from "next"; import { useLocalStorage } from "usehooks-ts"; import { darkTheme } from "../components/themes/darkTheme"; import { defaultTheme } from "../components/themes/defaultTheme"; const Home: NextPage = () => { const [, setTheme] = useLocalStorage("theme", defaultTheme); return ( <div> <button onClick={() => setTheme(defaultTheme)}>Use Default Theme</button> <button onClick={() => setTheme(darkTheme)}>Use Dark Theme</button> </div> ); }; export default Home;12345678910111213141516
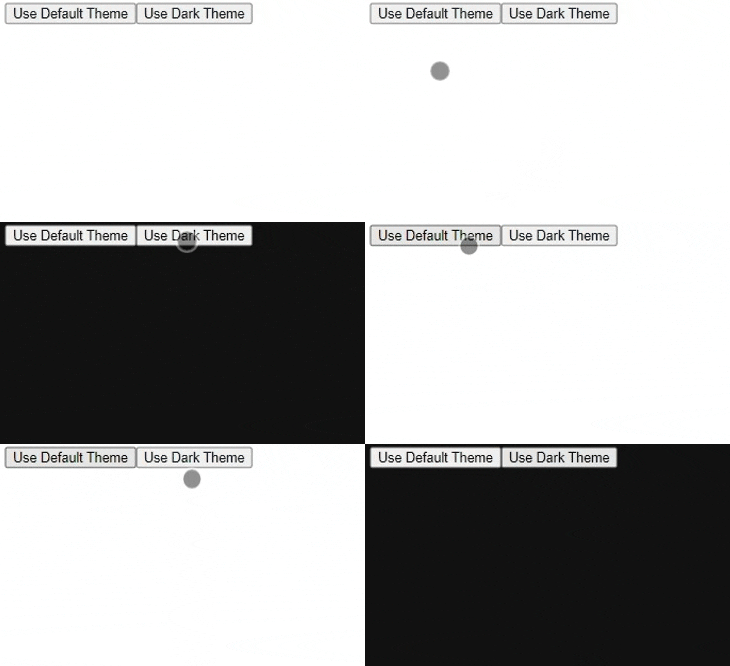
After this step, we can now check our output. Go to localhost:3000 and try to change the themes. Here's a demo:

If we check the source HTML, go to view-source:http://localhost:3000/, we also see that the CSS classes from the GlobalStyles component are server-side rendered.

Step 5 - Creating a Themed Button Component #
The last step in this tutorial is to create styled components that use our defined themes. We'll create a Button component with some props.
First, create the file: components/Button.tsx:
// components/Button.tsx import styled, { css, DefaultTheme } from "styled-components"; import { IPalette } from "../styled"; export type ButtonProps = { active?: boolean; // making this props optional variant: "contained" | "outlined"; color: keyof Omit<DefaultTheme["palette"], "common">; // we use our theme to type the colors }; export const Button = styled.button<ButtonProps>` /* common properties for button */ border-radius: ${(props) => props.theme.borderRadius}; padding: 4px 8px; :hover { cursor: pointer; } /* button specific props with theme */ ${({ variant = "contained", theme, color }) => { const _color = theme.palette[color] as IPalette; // render different styles for each variant: switch (variant) { case "outlined": return css` background-color: ${_color.contrastText}; color: ${_color.main}; border: 1px solid ${_color.main}; `; case "contained": default: { return css` background-color: ${_color.main}; color: ${_color.contrastText}; border: none; `; } } }} `;12345678910111213141516171819202122232425262728293031323334353637
Now we can use this styled Button component in pages/index.tsx:
// pages/index.tsx import type { NextPage } from "next"; import { useLocalStorage } from "usehooks-ts"; import { Button } from "../components/Button"; import { darkTheme } from "../components/themes/darkTheme"; import { defaultTheme } from "../components/themes/defaultTheme"; const Home: NextPage = () => { const [, setTheme] = useLocalStorage("theme", defaultTheme); return ( <div> <Button variant="contained" color="primary" onClick={() => setTheme(defaultTheme)} style={{ marginRight: 8 }} > Use Default Theme </Button> <Button variant="contained" color="secondary" onClick={() => setTheme(darkTheme)} > Use Dark Theme </Button> </div> ); }; export default Home;123456789101112131415161718192021222324252627282930
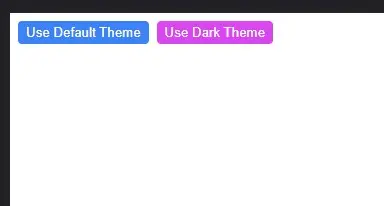
And here are the results:
Dark theme:

Default theme:

Full Code #
The full code is available on GitHub: https://github.com/jmarioste/nextjs-styled-components-typescript-tutorial
Conclusion #
We learned to successfully setup all the necessary things about styled-components and NextJS which are SSR, theme switching and creating styled-components with typescript. The main thing here is that we should be able to easily modify the themes and maintain our components easily while using Typescript.
If you like this tutorial, please leave a like or share this article. For future tutorials like this, please subscribe to our newsletter or follow me on Twitter.
Credits: Image by Joe from Pixabay


