How to Filter By Category in React

Jasser Mark Arioste

Hello, hustler! In this tutorial, you'll learn how to filter an array of objects by category in React and NextJS.
Introduction #
Sometimes, there's a requirement to filter a list by category such as blog posts, products, news, etc. This can either be done on the client-side using existing/pre-loaded data or on the server like when querying a database. For this tutorial, we're just going to filter on the client-side.
Final Output #
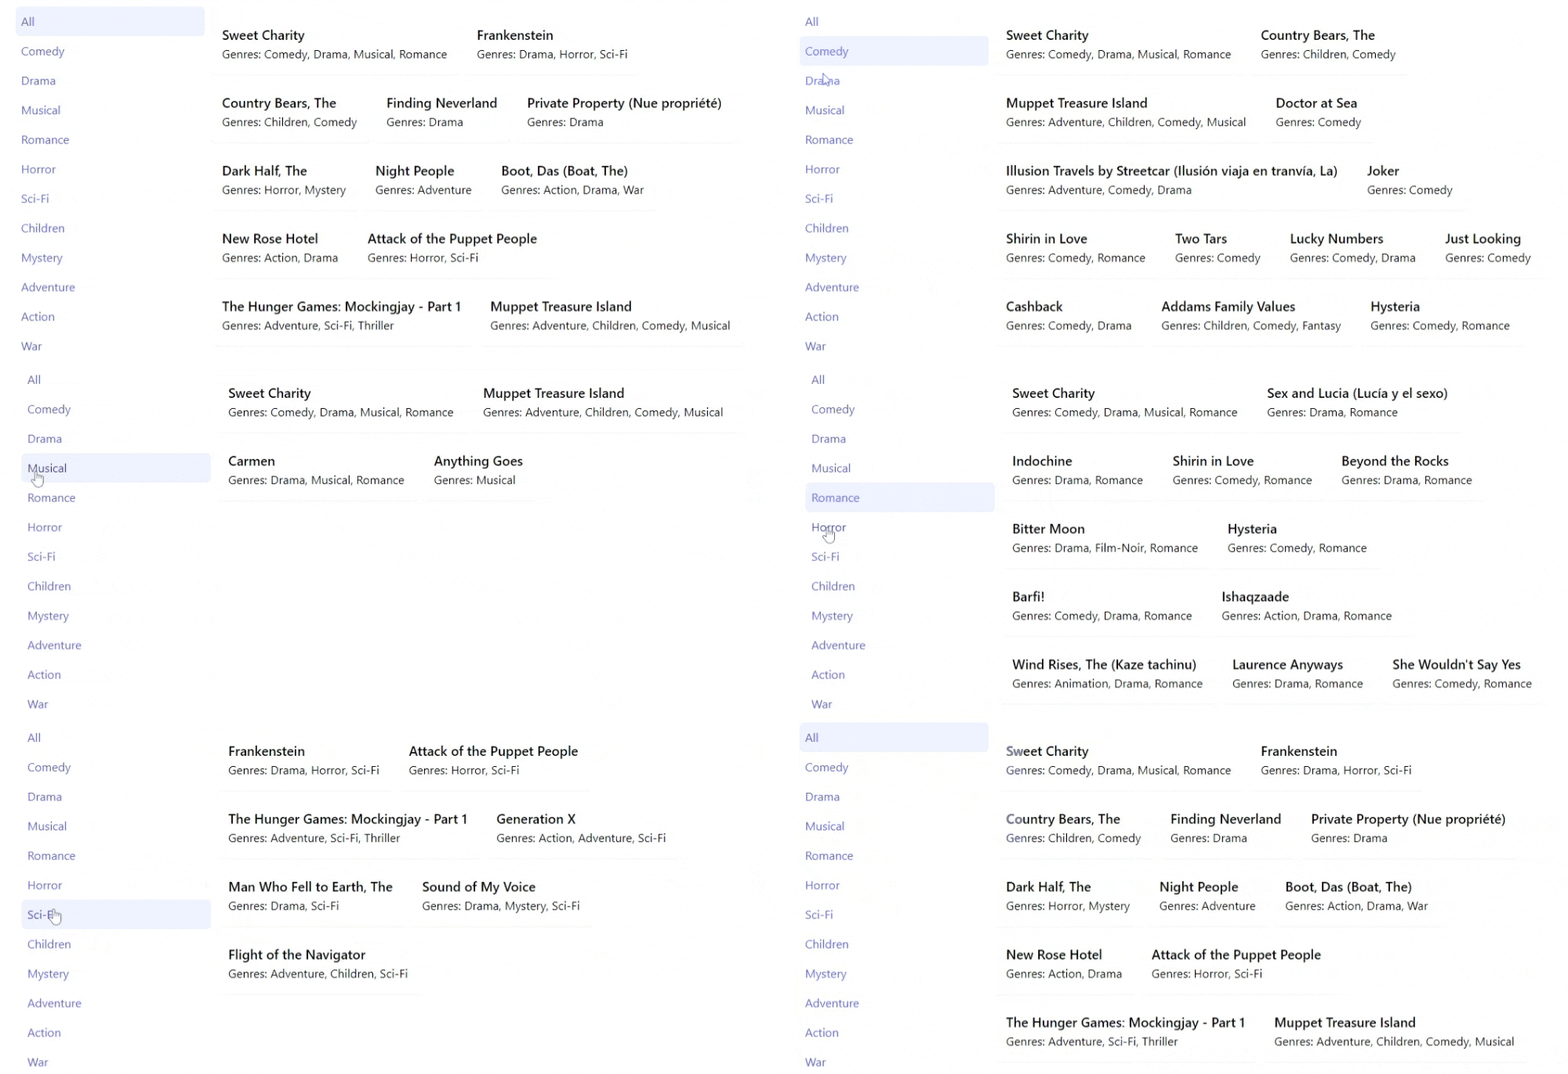
Below is the final output of what we'll be making today. We're going to create two components. <MovieGenres /> and <MovieList/>. Click a button in <MovieGenres/> and it shows the filtered movie list by genre. For styling, we're using TailwindCSS here.

Step 0 - Creating some Fake Data #
This step is optional since you probably already have data. But if you want to follow along from the start, you can go ahead and do this step. We're going to create fake movie list data with genre and title.
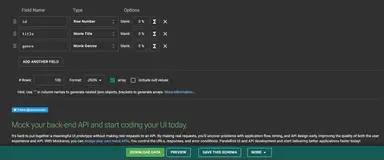
First, go to mockaroo.com and add the following properties: id, title (type = Movie title), genre (type =Movie genre). Check out the screenshot below:

Once you're done, click "Download data" and you'll end up with a file called MOCK_DATA.json that contains an array of objects like the one below:
[{"id":1,"title":"Sweet Charity","genre":"Comedy|Drama|Musical|Romance"},
{"id":2,"title":"Frankenstein","genre":"Drama|Horror|Sci-Fi"},
{"id":3,"title":"Country Bears, The","genre":"Children|Comedy"},
{"id":4,"title":"Finding Neverland","genre":"Drama"},
{"id":5,"title":"Private Property (Nue propriété)","genre":"Drama"},
{"id":6,"title":"Dark Half, The","genre":"Horror|Mystery"},
{"id":7,"title":"Night People","genre":"Adventure"},
// ...omitted for brevity
]123456789
Later, we're going to import this data and filter by genre/category.
Step 1 - Project Setup #
Next is the project setup but this step is also optional. We're going to set up a new NextJS + TailwindCSS project. We're going to use NextJS as our react framework and TailwindCSS for styling as I said before. I already created a NextJS template with tailwind pre-installed. You can just run the command below to kick-start a new project:
npx create-next-app -e https://github.com/jmarioste/next-tailwind-starter-2 react-filter-by-category-tutorial1
Once everything is installed, run the following command to start the local dev server:
cd react-filter-by-category-tutorial
yarn dev
Step 2 - Creating the <MovieGenres/> component
#
Next, let's create the <MovieGenres/> component. This component will control the selected genre or category.
Before we start creating the component, let's not forget about our movies data since we're going to use that here. Rename the MOCK_DATA.json to movies.json. Create a /data folder in the root directory of your project and move the movies.json file there.
Next, create the file components/MovieGenres.tsx and examine the code below:
// components/MovieGenres.tsx // 1. import the data import movies from "../data/movies.json"; // 2. the selected genre will be coming from a container component. type Props = { selectedGenre: string; onSelect(genre: string): void; }; const MovieGenres = ({ selectedGenre, onSelect }: Props) => { //3. lines 11-12 - get all the unique genres from the movie list const splitGenres = movies.flatMap((movie) => movie.genre.split("|")); const genres = Array.from(new Set(splitGenres)); return ( <ul className="flex flex-col "> {/* "All" for no filter */} <li className={!selectedGenre ? "bg-indigo-50 p-2 rounded-md" : "p-2"} onClick={() => onSelect("")} > <a className="text-indigo-500 cursor-pointer hover:text-indigo-700"> All </a> </li> {/* map through all genres */} {genres.map((genre, i) => { const isSelected = genre === selectedGenre; return ( <li key={i} // use a different class if the genre is selected. className={isSelected ? "bg-indigo-50 p-2 rounded-md" : "p-2"} // attach the onSelect handler onClick={() => onSelect(genre)} > <a className="text-indigo-500 cursor-pointer hover:text-indigo-700"> {genre} </a> </li> ); })} </ul> ); }; export default MovieGenres;1234567891011121314151617181920212223242526272829303132333435363738394041424344454647
Explanation:
This component is a display/dumb component that does not have its own state. The state selectedGenre comes from its parent component and we're able to modify the state by attaching a callback prop onSelect.
Step 2.1 - Usage
To use this component, let's create a container component called components/MoviePage.tsx.
// components/MoviePage.tsx import { useState } from "react"; import MovieGenres from "./MovieGenres"; const MoviePage = () => { const [selectedGenre, setSelectedGenre] = useState(""); return ( <> <div className="grid grid-cols-4"> <div className="col-span-1"> <MovieGenres selectedGenre={selectedGenre} onSelect={setSelectedGenre} /> </div> <div className="col-span-3">{/* for MovieList */}</div> </div> </> ); }; export default MoviePage;123456789101112131415161718192021
We have the selectedGenre state and pass it to the MovieGenres component
After this step, you should have the following output:

Step 3 - Creating the <MovieList/> component #
For the last step, we're going to create the <MovieList/> component. create the file components/MovieList.tsx:
// components/MovieList.tsx // import movies import movies from "../data/movies.json"; type Props = { selectedGenre?: string; }; const MovieList = ({ selectedGenre }: Props) => { // Lines 9-11 if there's a selectedGenre we use the array.filter function to filter the movie data // otherwise, return all the movies. const filteredMoviesByGenre = selectedGenre ? movies.filter((movie) => movie.genre.includes(selectedGenre)) : movies; return ( <div className="p-2 flex flex-wrap gap-2"> {/* map through all the filtered movies */} {filteredMoviesByGenre.map((movie) => { return ( <a key={movie.id} className="p-4 shadow-sm rounded-md"> <h2 className="text-lg font-semibold">{movie.title}</h2> <p>Genres: {movie.genre.replaceAll("|", ", ")}</p> </a> ); })} </div> ); }; export default MovieList;1234567891011121314151617181920212223242526272829
This is also a dumb component that's only used for display. It doesn't have its own state. We filter the genres by using array.filter function along with the string.includes function.
Next, we only have to use this component in the <MoviePage/> component like so:
// components/MoviePage.tsx import { useState } from "react"; import MovieGenres from "./MovieGenres"; import MovieList from "./MovieList"; const MoviePage = () => { const [selectedGenre, setSelectedGenre] = useState(""); return ( <> <div className="grid grid-cols-4"> <div className="col-span-1"> ... </div> <div className="col-span-3"> <MovieList selectedGenre={selectedGenre} /> </div> </div> </> ); }; export default MoviePage;123456789101112131415161718192021
After this step, you should have successfully implemented filter by category.
Full Code and Demo #
The full code is available on GitHub: jmarioste/react-filter-by-category-tutorial. And the demo is available on Stackblitz: React Filter By Category Tutorial.
Conclusion #
You learned how to filter a list by category in React by utilizing the useState function and creating components that interact with it. As homework, try to implement filtering by multiple categories.
If you like this tutorial, please leave a like or share this article. For future tutorials like this, please subscribe to our newsletter or follow me on Twitter.
Credits: Image by Ricardo Gatica from Pixabay


