How to Get the User's Country in NextJS

Jasser Mark Arioste

In real-world SaaS applications, it's common to have different product pricing for different countries. Suppose a subscription costs 30 USD, but for low-income countries, you give a 50% discount and it only costs $15. How do you implement this in a NextJS application?
In this tutorial, you'll learn how to get the user's country in NextJS when deploying on Vercel or any other platform. As a bonus, I'll include a way to simulate the country to check and apply the business logic.
There are many ways to access the geo location from the request:
- Using the
geoproperty fromNextRequestin NextJS. This works out-of-the-box if you're using Vercel as your hosting provider. - Using the geolocation header provided by your CDN or hosting provider.
- Using a 3rd-party IP Service.
We'll cover all three in this tutorial, you can decide which one works best for your requirements.
Using the Geo from NextRequest #
If you're deploying in Vercel, it's incredibly easy and accurate to get the country of the user. Inside NextJS middleware.ts, there's a built-in geo property from the NextRequest class that we can access to get the user's country:
// middleware.ts import { NextRequest, NextFetchEvent, NextResponse } from "next/server"; const RESTRICTED_COUNTRIES = ["PH", "US"] export async function middleware(request: NextRequest, _next: NextFetchEvent) { const res = NextResponse.next(); const country = request.geo?.country ?? "" if(RESTRICTED_COUNTRIES.includes(country)){ return NextResponse.rewrite(new URL("/restricted", request.url)) } return res; }1234567891011
Next, Let's create a page pages/restricted.tsx for displaying the restriction:
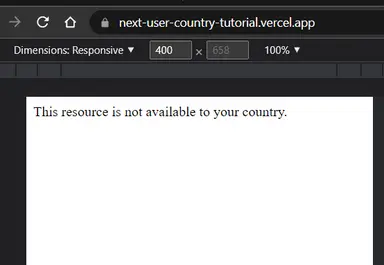
import React from "react"; const RestrictedPage = () => { return <div>This resource is not available to your country.</div>; }; export default RestrictedPage;12345
Explanation:
If the user is from PH or US, it will show the restricted page as shown below:

The problem with geo is that it's dependent on the provider. If you're using Vercel, there's no problem. But if you're using another hosting provider like Digital Ocean, for example, the geo object is empty and it doesn't return a country. You'll have to use some other means to get the user's country.
Using Custom Headers By Provider #
If your website uses a CDN proxy like Cloudflare or AWS CloudFront, you can use the headers they provide to get the user country.
If you're using Cloudflare you can use the cf-ipcountry header:
// middleware.ts import { NextRequest, NextFetchEvent, NextResponse } from "next/server"; const RESTRICTED_COUNTRIES = ["PH", "US"]; export async function middleware(request: NextRequest, _next: NextFetchEvent) { const res = NextResponse.next(); const country = request.headers.get("cf-ipcountry") ?? ""; if (RESTRICTED_COUNTRIES.includes(country)) { return NextResponse.rewrite(new URL("/restricted", request.url)); } return res; }1234567891011
If you're using AWS Cloudfront, you can use the cloudfront-viewer-country header.
// middleware.ts import { NextRequest, NextFetchEvent, NextResponse } from "next/server"; const RESTRICTED_COUNTRIES = ["PH", "US"]; export async function middleware(request: NextRequest, _next: NextFetchEvent) { const country = request.headers.get("cloudfront-viewer-country") ?? ""; if (RESTRICTED_COUNTRIES.includes(country)) { return NextResponse.rewrite(new URL("/restricted", request.url)); } return res; }12345678910
If you're using a different CDN, make use to read the documentation for which headers they provide.
Using a 3rd-Party IP Service #
If you're not deploying in Vercel and not using a CDN proxy, you can use a 3rd-Party IP service to get the country. There are many available services such as ipstack.com, ipapi.co, ipwhois.io, and many more.
This is the slowest way of getting the user country due to the extra API call, but it's more reliable than using headers (2nd option). You have to choose whether you prioritize speed or reliability.
In this example, we'll use ipapi.co:
import { NextRequest, NextFetchEvent, NextResponse } from "next/server"; const RESTRICTED_COUNTRIES = ["PH", "US"]; export async function middleware(request: NextRequest, _next: NextFetchEvent) { const res = NextResponse.next(); const country = request.cookies.get("country")?.value ?? ""; //get the ip address depending on your hosting provider. const ip = request.ip; if (!country) { try { const response = await fetch(`https://ipapi.co/${ip}/country/`); const country = await response.text(); if (country) { res.cookies.set("country", country); } } catch (error) {} } if (RESTRICTED_COUNTRIES.includes(country)) { return NextResponse.rewrite(new URL("/restricted", request.url)); } return res; }123456789101112131415161718192021
Explanation:
Line 5: First we check the cookie if we've already used the API
Line 7: Get the user's IP address. Make sure you know how to get the user's IP address in NextJS. See my previous tutorial: How to Get User's IP Address in NextJS
Line 8-15: We check if there's no country and the cookie hasn't been written. we call the IP Service, and use IP to get the user's country. We write it to the cookies so that it only calls the API once per visitor.
Code #
The full code can be accessed via GitHub: https://github.com/jmarioste/next-user-country-tutorial. I use different branches for each technique so make sure to check the other branches too.
Conclusion #
We learned how to get the user's country depending on the hosting provider, and CDN Provider that our NextJS application sits upon.
If you like this tutorial, please leave a like or share this article. For future tutorials like this, please subscribe to our newsletter or follow me on Twitter.
Resources: #
Credits: Image by Jackie Samuels from Pixabay


